Guide to Mosaic Tiles for Crafts
Mosaic tiles for crafts are like the colorful confetti of the creative world. Each piece tells a story, waiting to be woven into your next artistic adventure.
When I first stumbled upon these tiny treasures, I felt like a kid in a candy store. The endless variety of shapes, colors, and textures opened a portal to my imagination, inviting me to explore uncharted creative territories.
One of the things I adore about colorful tiles for diy projects is their versatility. Whether you’re decorating a flower pot, revamping old furniture, or creating a stunning wall art piece, these tiles are your trusty companions.
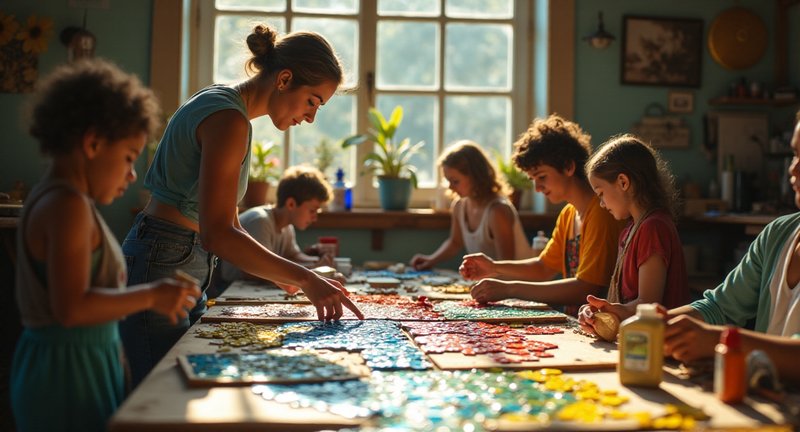
I remember the thrill of picking out my first set of mosaic tiles. I spent hours arranging and rearranging them, relishing the tactile experience. Each time I added a tile, it felt like I was breathing life into a new vision.
The joy of crafting with mosaic tiles comes not just from the final piece, but from the process itself. It’s a meditative experience, as each tile clicks into place, creating a vibrant context of color and form.
So, if you’re thinking of diving into the world of artistic mosaic pieces, I say go for it! Embrace the chaos of creativity, and let each tiny tile guide you on your journey.
The Best Mosaic Tiles for Crafts
When discussing picking tiles for a mosaic project, the variety can feel endless, but that’s part of the fun! Personally, I’ve found that the best tiles are the ones that bring out your creativity. You’re not just laying pieces together, you’re building a story.
Glass Tiles: If you’re looking for a vibrant, glossy finish, glass tiles are a top pick. They reflect light beautifully, making your design sparkle from every angle. I love using them in sun-catchers or brightening up a picture frame.
Ceramic Tiles: These offer a classic, more textured feel. What I like about ceramic is how easy they are to cut, which means you can shape them into whatever your heart desires. Perfect for those detailed, intricate designs.
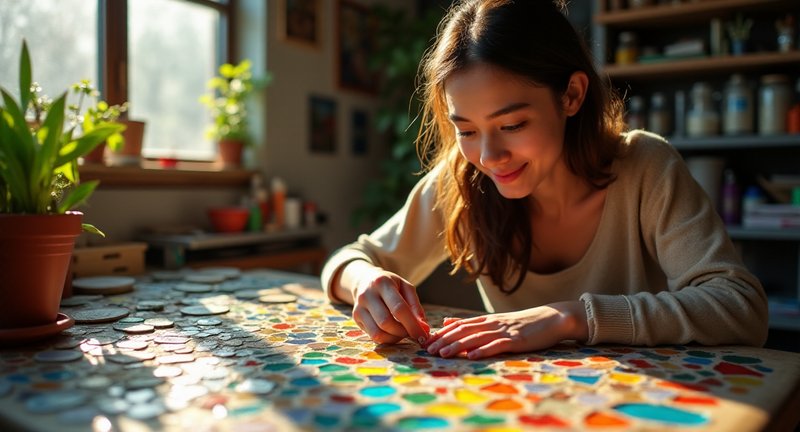
Mirror Tiles: Want a little extra drama? Mirror tiles add a sleek, modern touch. I’ve found they work wonders when you’re aiming for something eye-catching. They’re also great for smaller projects like coasters or decorative trays.
Natural Stone: For a more earthy, rustic vibe, natural stone is your best friend. These tiles bring in a sense of grounding. I often pair them with wood to create a more balanced and organic look.
Here’s a quick tip from my experience: don’t just stick to traditional tiles. Sometimes, using broken china or pebbles can bring a unique twist to your design. The variety adds texture and depth that’s hard to achieve with just one material. Keep it fun, and don’t be afraid to mix things up!
Introduction to Mosaic Crafting
I remember the first time I tried my hand at mosaic crafting it felt like painting with shards of color. Mosaic art has this incredible way of transforming everyday objects into stunning, intricate designs. If you’re just stepping into this world, let me give you a nudge in the right direction. You won’t need an art degree, just a bit of patience and a willingness to experiment.
Let’s start with the basics. In mosaic crafting, you’ll be piecing together small fragments, whether they’re glass, ceramic, or stone, to create a larger picture or design. Here’s what you’ll need to get started:
- Base material: It could be anything from a wooden tray to a picture frame whatever you want to transform.
- Adhesive: This is crucial. Choose an adhesive suitable for the surface you’re working on, like glue or mortar.
- Pieces for the mosaic: These can range from colorful glass to broken dishes or seashells. Your options are as limitless as your imagination.
- Grout: This fills in the gaps between the pieces, giving your mosaic that polished, finished look.
Once you’ve got your materials, here’s a little tip: Don’t rush. Lay out your design before you start gluing anything down. It’s like doing a jigsaw puzzle, but you’re the one creating the picture.
Mosaic crafting is not only relaxing but also incredibly rewarding. Each piece you place is a step toward something unique, a reflection of your personal style and creativity. You’ll find yourself lost in the process, and before you know it, you’ve created something truly one-of-a-kind.
Benefits of Using Decorative Tiles in Art
With regard to adding a splash of creativity to your art, decorative tiles are a real game-changer. I’ve spent countless hours experimenting with these little gems, and let me tell you, their impact is incredible. Not only do they add texture and dimension, but they also bring a level of customization that transforms a simple piece into something truly unique. Let’s dive into why using decorative tiles can elevate your artistic projects.
1. Endless Variety:
Decorative tiles come in an astonishing array of shapes, colors, and patterns. Whether you’re into geometric designs, earthy tones, or vibrant splashes of color, there’s something for everyone. You can even mix and match different tiles to create intricate designs that feel personal and expressive.
2. Durable and Long-Lasting:
Unlike other materials that may wear out or fade over time, tiles have a natural durability that makes your work more resilient. I’ve had pieces hanging on my walls for years, and the tiles look as good as they did when I first glued them in place. This longevity adds value, especially if you’re creating art to sell or gift.
3. Easy to Use for Any Skill Level:
Don’t worry if you’re a beginner working with tiles is super forgiving. You can arrange and rearrange them until you find the perfect layout. And the satisfaction of placing that final tile? There’s nothing like it!
4. Adds a Wow Factor:
There’s something magical about the way light bounces off a carefully placed tile. It gives your piece a dynamic, almost three-dimensional quality that draws people in. Every time I’ve shown off my tile art, it’s the first thing people comment on.
Give it a try! You might just find that using decorative tiles brings a whole new level of excitement to your artistic endeavors.
Choosing the Right Mosaic Pieces for Your Projects
Choosing the right pieces for your mosaic project is like curating a tiny, intricate world. From my experience, it’s not just about the colors you like though that’s important but also about the textures, shapes, and how they work together to form your vision.
First, consider the material. Glass pieces, for instance, catch the light in fascinating ways, creating reflections that add dimension. On the other hand, ceramic fragments offer a more rustic, earthy feel perfect if you’re going for something grounded and tactile.
Next, don’t forget about size and shape. Do you want something uniform and precise, or are you feeling adventurous with a mix of irregular, organic shapes? Sometimes, breaking the rules and going with asymmetry makes the whole design pop.
Here’s a tip from my own projects: always think about the spaces between the pieces the grout lines. Sometimes, leaving more space between the pieces creates a whole new dynamic, letting the pattern breathe.
When you’re gathering your pieces, remember you don’t have to stick with just traditional mosaic pieces. I’ve mixed in broken china, pebbles, and even small metal accents for an unexpected twist. Don’t be afraid to experiment your imagination is the only limit!
To summarize:
- Material: Glass for shimmer, ceramic for an earthy vibe.
- Shape and Size: Uniform vs. irregular let your creativity guide you.
- Grout Consideration: Leave intentional space for contrast or visual breathing room.
- Mixing Mediums: Add found objects for a personal touch.
Choosing mosaic pieces is like choosing the perfect ingredients for a recipe. You want variety, balance, and a bit of surprise. That’s what turns a simple project into a masterpiece.
Essential Tools for Mosaic Artistry
Regarding mosaic artistry, the right tools can make all the difference. From my own experience, I’ve found that certain items become indispensable once you get into the rhythm of creating.
First, let’s talk about cutters. If you’re serious about getting those intricate shapes just right, a wheeled glass cutter is your best friend. It allows for precision and smooth cuts, something basic nippers just can’t do.
Next up is adhesive. Now, some people swear by simple glue, but I’ve always leaned towards a stronger, tile-specific adhesive. It grips better and gives you more time to adjust before things are set in stone literally.
Don’t overlook your surface. A solid base, whether it’s wood or mesh, is the backbone of your project. I usually opt for mesh when working on more delicate or curved designs, as it allows more flexibility without compromising the structure.
Grouting is where your piece comes to life. The right grout float and sponges can elevate the final look, helping smooth out those tiny gaps and perfecting the finish. Trust me, a bad grouting job can really dull down an otherwise vibrant masterpiece.
Also, always keep a good pair of tweezers on hand. They’re essential for placing those minuscule pieces with precision. Sometimes, the smallest details are what draw people in.
It’s all about having the right tools at your disposal, and each piece you create becomes a learning experience in refining your technique.
Step-by-Step Guide to Creating a Mosaic Art Piece
When I first started making mosaics, I had no idea how captivating the process could be. It’s like putting together a colorful puzzle, where you control the image, the texture, and the vibe. First things first: pick a design. Whether you’re sketching your own or following a template, you’ll need a clear vision to guide you.
Once you’ve got your design, it’s time to break it down. Literally. You’ll need to prepare your pieces. I like to play around with different materials glass, ceramics, or even old plates cutting them into shapes that fit my vision. This is where the fun really begins.
Now, here’s the trickiest part: laying the pieces. Start from the center and work your way out, or vice versa if you feel daring. Make sure each piece has a little breathing room for the grout. It’s a lot like assembling memories you have to be careful, yet willing to experiment.
One of the best lessons I learned early on was to mix up the textures. Adding rough pieces next to smooth ones creates a tactile experience that gives your art dimension. It’s not just about what it looks like, but also what it feels like under your fingers.
As a matter of fact, when everything’s in place, apply the grout. This part always feels like magic to me suddenly, everything connects, and the picture comes to life. Wipe off the excess, let it set, and you’ll have a mosaic that’s uniquely yours.
Unique Ways to Incorporate Tiles in Home Decor
Tiles are one of those materials that can transform a space in ways you might not expect. I’ve always found them to be incredibly versatile when it comes to home decor. Whether you’re looking to add a pop of color or texture, tiles can do wonders. It’s not just about the kitchen backsplash anymore tiles can be part of almost any room in your house.
One idea I love is using tiles as a decorative border for mirrors or picture frames. It adds a touch of elegance without overwhelming the design. Imagine a framed mirror that subtly complements the colors of your bathroom or living room. It’s a small detail, but it can make a huge difference.
Another unexpected way I’ve seen tiles used is on tabletops. Instead of the typical wood or glass, try creating a tile mosaic on an old coffee table or side table. It’s a functional piece of art that also serves a practical purpose. Plus, you can choose any color scheme you like, making it truly personal.
Don’t overlook using tiles to create custom wall art. I once saw an entire wall covered in mismatched tiles, arranged like a sprawling mural. It was bold, but also inviting. If you’re feeling adventurous, consider using tiles to create your own wall masterpiece something that reflects your personality.
Tiles can even find a home in your outdoor spaces. I’ve seen tiles incorporated into garden paths, turning a simple walk into something more enchanting. It’s a creative way to bring your indoor aesthetic outdoors.
Using Mosaic Materials for Outdoor Projects
From my own experience, using mosaic materials for outdoor projects opens up endless creative possibilities. I’ve spent countless weekends experimenting with all sorts of designs, and trust me, there’s nothing quite like seeing a unique piece of art glimmer in the sunlight on your patio or garden wall.
Regarding outdoor mosaics, durability is key. You want materials that can withstand the elements. I’ve learned that natural stones and porcelain tend to hold up better than glass in outdoor settings, which is something you don’t often hear. They can be integrated into pathways, benches, or even birdbaths. You can create intricate patterns, or keep it simple with geometric shapes.
Here’s a quick guide on what works best:
- Natural stones – Think slate, marble, or pebbles. These are fantastic for blending in with the natural environment.
- Porcelain – A bit of an unsung hero, porcelain tiles are frost-resistant and tough.
- Broken ceramics – If you’ve got some old plates or cups lying around, don’t toss them. They add quirky character to your outdoor pieces.
For adhesive, I’ve always gone with outdoor-rated thinset mortar. It’s designed for projects that will get wet and go through temperature changes. And one thing you shouldn’t forget: seal your finished piece! A good sealant will protect your mosaic from moisture damage and help maintain its color.
It’s always such a fulfilling process – selecting materials, playing with patterns, and finally seeing it all come together. The best part? Every time you walk outside, you’ll be greeted by your own art.
An In-Depth Exploration of Mosaic Tiles for Crafts
Mosaic tiles for crafts are more than just little squares or bits of glass – they’re like tiny, colorful puzzles waiting to come together in a masterpiece. When I first started working with these, I was drawn in by the almost hypnotic effect of carefully arranging them piece by piece.
Choosing the right materials is a bit like deciding which spices to add to a dish. Each tile, whether ceramic, glass, or stone, brings its own personality to the table. I remember the first time I combined smooth glass with rough-cut ceramic; the contrast added a texture that surprised even me.
There’s something therapeutic about the whole process. Sitting there, placing tiles one by one, time seems to melt away. For anyone who loves a hands-on, calming hobby, crafting with mosaic pieces offer an incredible opportunity to unplug from the world.
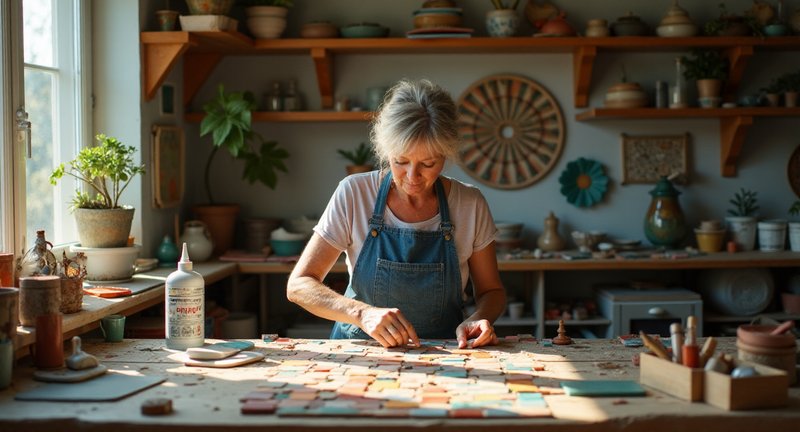
A trick I’ve picked up over time is to mix colors in unexpected ways. Maybe throw in a pop of bright yellow where you wouldn’t expect it, or pair cool tones with something fiery. The beauty of this craft is that there are no hard and fast rules – the joy is in the experimentation.
For those new to the world of mosaic, start with small projects. A picture frame or a coaster is a great way to get a feel for how the tiles move together. Trust me, once you start, you won’t be able to stop. The feeling of turning a plain surface into something stunning is like capturing magic in your hands.
Creative Techniques for Mixing Tile Sizes and Shapes
As it relates to mixing tile sizes and shapes, there’s an art form that goes beyond simply filling space. You don’t just want to slap tiles on a surface; you want to create something dynamic, something that feels like it has rhythm. That’s where playing with various sizes and shapes really shines.
Here’s a technique I like: Start by laying a foundation of larger tiles as your base. These anchor the design and provide a canvas to build from. Then, gradually sprinkle smaller tiles into the mix, filling gaps and creating contrast. This isn’t just about aesthetics it’s about flow. The variation in size leads the eye, giving the piece a natural movement.
A few tips:
-
Contrast with purpose: Use contrasting colors and shapes deliberately. If you have square tiles, balance them out with a few rounds or hexagons. But don’t overdo it too many shapes can make the design look chaotic.
-
Think about spacing: How close or far apart you place the tiles changes everything. Tight placement gives a cleaner, more cohesive look, while wider gaps between different sizes create a more organic, freeform feel.
-
Play with texture: Incorporate both flat and textured tiles to add depth. Smooth surfaces can be balanced out with rougher, more tactile pieces, offering a more engaging final product.
Remember, breaking the rules a bit can lead to unique, eye-catching results. I’ve found that some of my most interesting projects came from an unexpected pairing of tile sizes and shapes. So, don’t be afraid to experiment what seems like an odd combination might just be the secret ingredient to a masterpiece.
Color Theory in Mosaic Design
When I first started working with mosaics, I didn’t realize just how much color could change everything. The way colors interact in a mosaic can either create harmony or cause a chaotic clash that’s impossible to ignore. It’s more than just placing pretty pieces side by side.
Think about how warm and cool tones can evoke different emotions. I’ve found that blues and greens tend to bring a sense of calm, while yellows and reds inject energy into the design. Knowing this, you can make intentional choices that shape how someone feels when they look at your work.
There’s also a fascinating trick with contrast. If you’ve ever played around with placing light tiles next to dark ones, you’ll notice how much they make each other pop. It’s almost like they’re in conversation, each helping the other stand out more than if they were alone.
But, it’s not all about stark contrasts. Sometimes, subtlety is your best friend. Gradients when colors slowly transition from one to another can create a flowing, natural look that feels soothing. It’s like watching a sunset stretch across the sky in miniature.
Of course, experimenting is key. I’ve had some happy accidents where I stumbled upon combinations I’d never have planned but fell in love with instantly. If something doesn’t work, don’t stress. Just rework it there’s no such thing as a ‘wasted’ tile in the world of mosaic design.
Upcycling Ideas with Broken Tiles
I’ve always loved finding new purposes for things most people throw away, and broken tiles are no exception. At first glance, they might seem like useless shards, but with a bit of creativity, they can breathe life into something entirely unexpected.
Take a cracked kitchen tile, for instance. Instead of discarding it, I once used it to create a vibrant planter design. The irregular edges of the tiles actually made the piece look more organic, as if it was meant to be that way all along.
Another great use for broken tiles is transforming an old, tired table. It’s incredibly satisfying to break the tiles into even smaller pieces, then arrange them into intricate patterns. The best part? There’s no pressure to be perfect. In fact, the more eclectic the design, the better it tends to turn out.
Have you ever thought about sprucing up your outdoor space with them? I’ve seen amazing stepping stones made from broken tiles, and they can add such character to a garden. With the different colors and shapes, no two stones look alike, giving your yard a personal touch.
The trick is to let your imagination run wild. What was once broken now becomes part of a bigger story, a piece of art with its own unique twist. So the next time you see a shattered tile, don’t throw it out. Think about what it could become. You’ll be surprised at the possibilities.
Mosaic Tile Projects for Beginners
Starting a mosaic tile project is like stepping into a world where creativity meets calmness. The process of placing each tile becomes almost meditative, as you watch the bigger picture come together, piece by piece. It’s a hobby that demands patience but rewards you with stunning results.
For beginners, I always recommend starting small. Your first project doesn’t need to be a grand mural. Simple designs on coasters, trays, or picture frames offer a perfect canvas to practice on. Trust me, once you see that first completed piece, you’ll be hooked.
One thing I learned early on is to embrace imperfection. Unlike painting or drawing, mosaic art is forgiving. A few crooked tiles here or there? It only adds character. I’ve had moments where I wasn’t sure if things were looking right, but by the end, the mosaic had its own unique charm.
When choosing materials, don’t limit yourself to traditional tiles. I’ve experimented with broken plates, colorful glass, and even old jewelry pieces. The fun part is scouring thrift stores and recycling bits and pieces into your design. It’s like treasure hunting for your next masterpiece.
Another tip I’d give is to plan your color palette before gluing anything down. It’s tempting to just dive in, but a little foresight goes a long way. Playing with contrast and texture can elevate your project from good to gallery-worthy. And don’t worry if your first project isn’t perfect. With each new mosaic, you’ll discover something new about the craft and about yourself, too.
Advanced Techniques for Experienced Crafters
Once you’ve mastered the basics of crafting, it’s time to dive into the more intricate techniques. For me, this is where the magic truly happens. Precision becomes key, and every detail starts to count more than you think.
Layering textures has become one of my go-to approaches. By experimenting with various materials, I’ve learned that texture can bring dimension to any project. It’s amazing how a simple shift in material can completely transform a piece.
Another trick I’ve picked up is embracing imperfections. That’s right, I said it. Perfection is overrated. Sometimes, the most interesting work comes from what appears to be mistakes. Letting go of control allows for a unique, organic flow in your projects.
Then there’s the art of combining patterns in unexpected ways. I remember when I started playing around with clashing patterns it felt bold, maybe even a little too daring at first. But when done right, it adds a depth and complexity to the work that you just can’t ignore.
I’ve also come to appreciate the power of negative space. Sometimes, it’s not about what you add, but what you leave out. Leaving intentional gaps can make the rest of your work stand out even more.
Also, try pushing the limits with layering colors. It’s not just about finding colors that go well together; it’s about finding shades that create an emotional reaction. That’s when you know you’ve struck crafting gold.
Q&A Insights
What are the cons of mosaic tiles?
Mosaic tiles come with some disadvantages, including the need for more intricate installation due to their smaller size, which can be time-consuming and require skilled labor. The grout lines between each small piece also require more frequent cleaning and maintenance to avoid grime buildup. Additionally, mosaic tiles tend to be more expensive than larger tiles, both in terms of material cost and installation. Also, while they can add aesthetic value, their patterns may not suit every design style or preference.
Can you use Mod Podge for mosaic tiles?
Yes, Mod Podge can be used for mosaic tiles, particularly in crafting and DIY projects. It acts as both a glue and a sealant, allowing you to adhere the tiles to a surface and provide a glossy finish to protect the design. However, Mod Podge may not be ideal for high-traffic areas or wet environments, like floors or bathrooms, as it’s not waterproof or as durable as traditional tile adhesives. For permanent or functional mosaic installations, a stronger adhesive and grout are recommended.
What is the difference between ceramic and mosaic tiles?
The primary difference between ceramic and mosaic tiles lies in size and application. Ceramic tiles are typically larger, making them suitable for large surface areas such as floors and walls. Mosaic tiles, on the other hand, are much smaller and are often used for decorative purposes or intricate designs. While mosaic tiles can be made of ceramic, they can also come in various other materials like glass, stone, or metal. The small size of mosaic tiles allows for creative patterns, while ceramic tiles are usually used for uniform finishes.
Why are mosaic tiles so expensive?
Mosaic tiles tend to be more expensive due to the labor-intensive production process and the detail involved in installation. Since these tiles are often made from high-quality materials like glass, marble, or natural stone, the cost of raw materials can drive up the price. Additionally, installing mosaic tiles requires a high level of craftsmanship, as each small piece must be meticulously placed and grouted. The customization options and intricate patterns offered by mosaic tiles further contribute to their premium price point.
What is the biggest danger of working with mosaic art?
One of the biggest dangers of working with mosaic art is handling the sharp edges of the tiles, especially glass tiles, which can cause cuts and injuries. Protective gloves should always be worn during the cutting and placement process to minimize the risk. Additionally, inhaling dust from cutting or sanding materials like glass, ceramic, or stone can be harmful, so wearing a mask is recommended. Without proper care and safety measures, mosaic artists may also face long-term strain on their hands and wrists due to the precision work involved.
Do you have to grout mosaic tile?
Yes, grouting is essential when installing mosaic tiles to fill the gaps between the individual pieces, ensuring the tiles stay securely in place and are protected from moisture. Grout also helps to create a smooth and level surface, making the installation both functional and aesthetically pleasing. Without grouting, water and dirt can seep between the tiles, leading to damage or discoloration. Proper grouting also enhances the visual appeal of mosaic tiles by defining the pattern and adding contrast.
Are mosaic tiles good or bad?
Mosaic tiles can be both good and bad, depending on the application and personal preferences. They are excellent for creating unique, eye-catching designs and can add a lot of character to a room. Their small size allows for versatility in areas where larger tiles may not fit. However, mosaic tiles can be expensive and require more maintenance due to the increased number of grout lines. The installation process is also more complex, making it less ideal for those on a budget or tight schedule.
Are mosaic tiles out of fashion?
Mosaic tiles are not out of fashion, though their popularity tends to ebb and flow with design trends. While some minimalist styles might favor larger, more uniform tiles, mosaic tiles are still valued for their artistic and decorative qualities. They are especially popular in bathrooms, kitchens, and accent walls where intricate patterns and textures can make a statement. As homeowners and designers continue to seek personalized and creative touches, mosaic tiles remain a timeless option for adding visual interest to a space.
Are mosaic tiles slippery when wet?
Mosaic tiles can be slippery when wet, particularly if they have a smooth or glossy finish. However, the numerous grout lines between each tile can provide extra grip, which can reduce the risk of slipping. Textured mosaic tiles or those made from less slippery materials, like stone, are better suited for wet areas such as bathrooms or pool surrounds. It’s essential to choose the right type of mosaic tile for areas where moisture is present, and ensure proper cleaning to maintain slip resistance.
Do mosaic tiles make a room look bigger?
Mosaic tiles can make a room look bigger depending on the design and color choices. Light-colored mosaic tiles, especially when arranged in reflective materials like glass, can help open up a space and make it appear larger by reflecting light. Using small, intricate patterns can create the illusion of depth and complexity, which tricks the eye into perceiving a larger area. However, if too many contrasting colors or busy patterns are used, they can make a space feel more cluttered or smaller than it is.







This post really resonated with me! Tiles have always been my secret weapon for adding that extra ‘wow’ factor to a space. I’ve used them to jazz up picture frames and mirrors just like you described, and they never fail to make a subtle but impactful statement. Recently, I also did a mosaic tabletop for my patio, and it’s become a conversation piece whenever friends visit. I think people sometimes overlook how versatile tiles can be – they’re not just for kitchen backsplashes! What I love most is how personal you can make these projects. Each tile or piece you choose adds a little bit of your style, whether you’re going for bold or understated. The idea of creating a mural on a wall using mismatched tiles sounds super exciting. I’ve been thinking about doing something like that in my entryway. It seems like such a creative and unique way to make a house feel truly like home, with every piece contributing to the overall vibe. There’s something special about transforming
I totally agree with how mesmerizing mosaic-making can be! When I first tried it, I was surprised by how meditative the whole process feels. You really get lost in creating the design and choosing the materials. Breaking up old plates or glass into just the right shapes feels like unlocking a new way to see everyday objects. Starting from the center and working outward, like you mentioned, adds a fun challenge too. It’s almost like watching an abstract puzzle come to life piece by piece!
Great tips on the tools! I started out with basic nippers for my mosaic projects, but once I got my hands on a wheeled glass cutter, it was a total game-changer. The precision you can get with those is amazing – especially for those tricky little shapes. I’ve also learned the hard way that a good adhesive can make or break the project (literally!). And yes, grout is the unsung hero in mosaics – it pulls everything together and gives the whole piece that polished look. I swear, the smallest details like tweezers can really be a lifesaver when you’re trying to fit those tiny bits into just the right spot!
Absolutely love how you compared choosing mosaic pieces to curating a tiny world! I’ve always found it’s such a delicate balance between color, texture, and even the space between pieces that really makes a mosaic special. I also love experimenting with different materials – mixing glass and ceramic adds so much depth, and the way you described playing with grout lines really resonates with me. Leaving extra space between pieces can change the entire feel of the design! Totally agree that variety is key to creating a unique masterpiece.
Oh wow, I couldn’t agree more! Decorative tiles are such a game-changer for any art project. I’ve been playing around with them too, and it’s amazing how just adding a few can totally transform a piece. That “wow” factor you mentioned when light hits the tiles? Spot on! It’s like they bring the artwork to life in a whole new way. Definitely worth a try!
Ah, this brought back memories of my first mosaic project! I love how you compared it to painting with shards of color because that’s exactly how it feels. There’s this moment when everything starts coming together, and it’s like you’re slowly revealing this hidden masterpiece. And the best part? You don’t have to be an expert to create something really special.
I love how you broke down the different types of tiles here! It’s so true each material has its own personality, and it’s all about choosing the one that speaks to you (and your project, of course!). I’m a huge fan of glass tiles; they’ve got this dazzling effect that makes whatever you’re working on feel so much brighter and alive. I made a mosaic mirror using glass tiles once, and it catches the light in such a mesmerizing way. Totally agree about their magic in sun-catchers too!
I couldn’t agree more with this! The way mosaic tiles transform a simple craft project into something so dynamic and full of life is truly magical. I remember my first experience with them, too totally felt like I was opening up a new world of creativity. It’s funny you mention that thrill of picking out your first set; I had the same moment of awe. I spent hours arranging and rearranging, trying to make sure every piece had its own little story to tell. The meditative aspect is SO real I find it super calming, like a creative escape where you lose track of time but in the best way possible.